
Table of Contents
- 1 Introduction
- 2 Struggling with Hard Lino and Rough Finishes in Linocut Printmaking
- 3 Difficulty Carving the Design as Intended
- 4 Poorly Defined Lines and Depth Control
- 5 Carving Mistakes: Removing the Wrong Section
- 6 Uneven Ink Application to your Linocut
- 7 Ink Not Sticking Properly to the Linocut
- 8 Blotches or Debris in the Print
- 9 Persistent Ink Spills in Dead Spaces
- 10 The Paper Isn’t Transferring the Ink Evenly
- 11 Misalignment Between the Paper and Lino Block
- 12 Final Words
- 13 Sources
Introduction
Linocut printmaking is a rewarding technique, but it comes with its challenges. It’s after many repetitions and reassessing what is happening during different parts of the process when you can not only identify the issue but find a solution to your mistakes.
Some of the most common linocut mistakes include: difficulty carving intricate designs, using hard or rough lino, poorly defined lines, accidental carving errors, uneven ink application, ink not sticking to the lino, blotches in the print, misalignment, ink spills in dead spaces, uneven ink transfer, and excessive carving still leading to ink marks.
This article highlights 10 Most Common Linocut Mistakes and How to Fix Them, and they have been organized in the order that felt most intuitive to the printing process. Following these tips you can produce cleaner, more consistent prints while minimizing waste.
Struggling with Hard Lino and Rough Finishes in Linocut Printmaking
Older or lower-quality lino can become too stiff, leading to rough, uneven carving and making it more prone to making linocut mistakes due to the resistance of the material when carving.
How to Fix It
- Soften the lino by applying a few drops of linseed oil before transferring your design.
- Gently warm the lino
 using a hairdryer, radiator, or even bright sunlight to make it more pliable.
Pro Tip: If your lino is still difficult to work with, it might be time to invest in fresher, more manageable materials.
Difficulty Carving the Design as Intended
If your design doesn’t translate well into the final carving, it might be due to over-complicated details or a design that’s too small for precise cuts.

How to Fix It
- Avoid overly intricate designs until you’re comfortable with the process.
- Consider the scale of your design—larger designs are generally easier to carve accurately.
- Materials like rubber may be too soft for detailed work, so opt for more rigid linoleum for better control. Check out which lino is better for you.
- Test the specific lino you plan to use and adjust your design based on how it handles.
I use Xulmar Tracing Paper and Carbon Transfer Paper to do my designs. Nothing too sophisticated.
Pro Tip: Always do a test print before committing to a final design. Adjust and refine your carving gradually to avoid removing too much material.
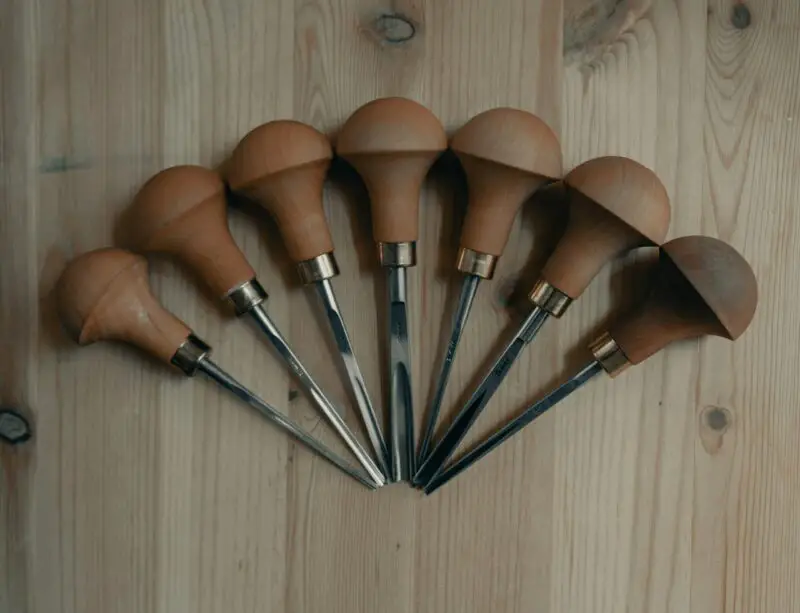
Poorly Defined Lines and Depth Control
One of the most common linocut mistakes is using dull tools, leading to poorly defined lines. Having dull tools can make it challenging to achieve crisp, clean lines, leading to jagged or inconsistent cuts.
How to Fix It
- Regularly sharpen your tools using a wet stone or leather strop with honing paste.
- There are other ways to sharpen your tools, like Using Stropping Equipment and Slide the Cutting Tool Repeatedly.
- Invest in quality tools rather than buying an entire range; 3-4 basic tools are sufficient for most designs.
Pro Tip: Properly sharpened tools require less pressure, reducing the risk of mistakes and improving line consistency.
: Sharpening linocut toolsCarving Mistakes: Removing the Wrong Section
Mistakes happen, but they don’t have to ruin your entire print. This is one of the most frustrating ones and I have only attempted this once. This is the linocut mistake I dread the most.
How to Fix It
- Trace your design on paper to keep track of your intended cuts.
- Carefully re-carve the missing section on a separate piece of lino, trim it to fit, and attach it with glue and fabric reinforcement.
Pro Tip: Make smaller cuts first rather than big ones. This reduces the risk of carving away essential areas by mistake.
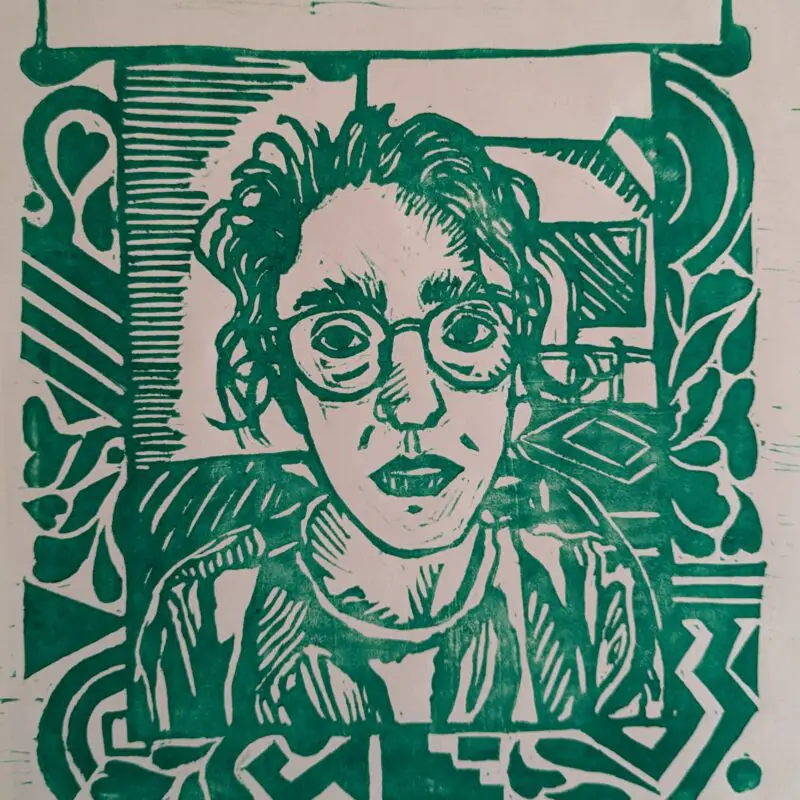
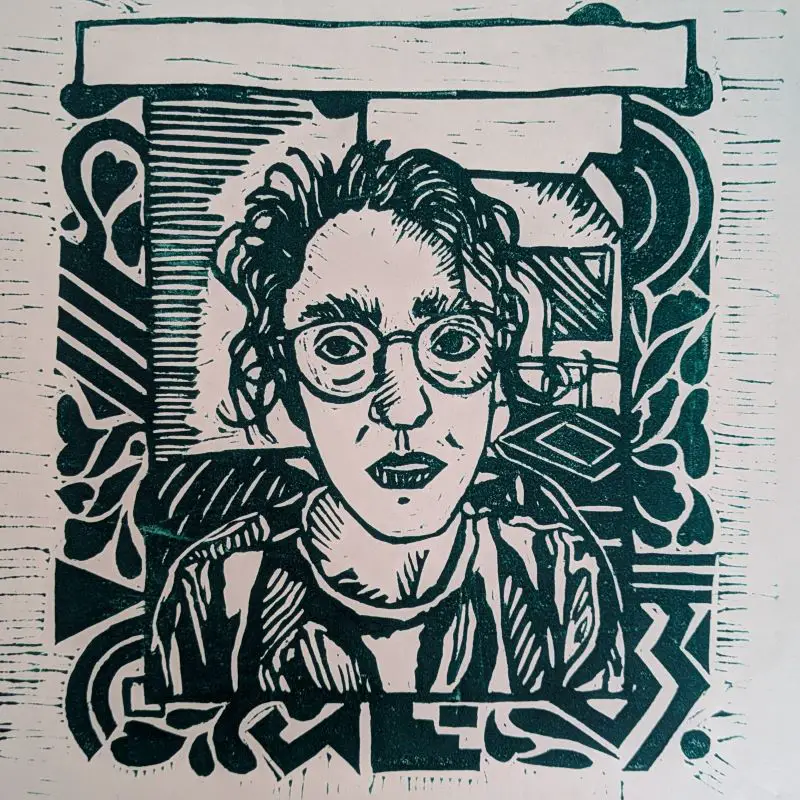
Uneven Ink Application to your Linocut
Uneven ink coverage is often due to dirt or grease on the block. This is unfortunately one of my most common linocut errors as you can see below.
How to Fix It
- Clean your block thoroughly with dish soap and water before inking.
- Ensure your roller is soft and in good condition —hard rollers can lead to patchy ink application.
- Make sure you are using the ink that gives you the intended result —consider if acrylic or oil painting is what’s best for you.
Pro Tip: Keep your workspace clean, and avoid touching the block excessively, as natural oils from your hands can affect ink adhesion.
Ink Not Sticking Properly to the Linocut
Sometimes, the ink doesn’t adhere well, resulting in patchy prints.
How to Fix It
- Lightly sand the lino with a soft sanding block and a drop of water to remove any residual grease and create a better surface for ink adhesion.
Pro Tip: It’s best to prep the lino by sanding before carving, especially if it has an overly smooth surface.
Blotches or Debris in the Print
These small imperfections are often due to leftover lino particles.
How to Fix It
- After carving, thoroughly clean the block, paying extra attention to the “dead spaces” (areas not meant to receive ink).
Pro Tip: Even after cleaning, inspect the block for any ridges that might still pick up ink. Keep these areas as smooth as possible.
Persistent Ink Spills in Dead Spaces
Ink can still get into unwanted areas even after extensive carving.
How to Fix It
- Ensure dead spaces are as smooth as possible, eliminating any ridges that could hold ink.
- Cover dead spaces with a film material to block ink from reaching those areas.
Pro Tip: Laura Boswell’s method of using a film to cover the dead spaces after inking is an effective way to keep your prints clean.
The Paper Isn’t Transferring the Ink Evenly
If your print isn’t transferring evenly, it could be due to inconsistent pressure.
How to Fix It
- Consider using tools like a baren or a spoon to apply even pressure.
- Make sure your workspace is level and stable to avoid uneven prints.
Pro Tip: Practice applying consistent pressure across the entire block for smoother, more even prints.
Misalignment Between the Paper and Lino Block
Uneven edges after printing often indicate poor alignment.
How to Fix It
- Use fixed indicators on your baseboard to guide the placement of both the lino block and the paper.
- A non-slip mat can help keep everything stable during the process.
Pro Tip: If alignment issues persist, consider these prints as proofs for troubleshooting design or technique errors.
Final Words
Linocut printmaking is a nuanced craft that rewards patience and precision. By addressing these common linocut mistakes, your printmaking process will yield more consistent and professional results, and you can create cleaner, more professional prints while embracing sustainable practices by reducing the amount of waste you produce as much as possible. To achieve clean, precise linocut prints and avoid common mistakes, we suggest:
- Plan and Design Wisely: Start with designs that match your skill level. Keep the scale manageable and avoid overly intricate details until you’ve gained more experience.
- Use the Right Materials: Choose linoleum that suits your project—softer lino is better for beginners, while more rigid materials work best for fine details. Always test the lino before starting your final design.
- Maintain Sharp Tools: Keep your carving tools sharpened for smoother, more controlled cuts. Invest in a few high-quality tools instead of a large set you might not need.
- Prevent Carving Mistakes: Make smaller cuts first to reduce errors. Use non-slip mats and carve towards “dead spaces” for safer and more accurate work.
- Prepare Your Lino Properly: Soften hard lino before carving and lightly sand it to improve ink adhesion. Clean both the block and your workspace to avoid unwanted ink marks.
- Ensure Smooth Ink Application: Clean your block and roller thoroughly before inking, and use a soft roller for even coverage.
- Align Your Prints Accurately: Set up fixed guides on your baseboard to align the lino block and paper correctly. Use a non-slip mat for added stability during printing.
- Keep Dead Spaces Clean: Smooth out carved areas to prevent residual ink marks, and consider using a film cover to block ink from these spaces.

Sources
- Artists & Illustrators: 10 top tips for linocut printmaking
- Boarding All Rows: Dealing with Ink in the Negative Space of a Linocut Design
- Handprinted: How to Fix Ink Reticulation when Relief Printing
- Hickman Design: How to Lino Print for Beginners?
- Laura Boswell: Cutting Techniques: Multiblock Linocut Print
- Maarit Hänninen: How to fix mistakes in linocuts, by Maarit Hänninen
- Moatzart: Linocut printmaking – which is the best lino to use? Beginner friendly
- Professor Truszkowski: Sharpening linocut tools
- Sasheeprints: Beginner linocut mistake
- The Happy Dragon’s Press: Lino-Cutting Tips
- The Recoverie: Are you making these block printing mistakes?
- The Weekend Beckons: 8 linocut safety tips to to stay safe
- Weir, Lynette: Printing Linocuts…some common problems…