
The wet on wet painting technique involves applying wet paint on a wet area of the surface of your painting. The wet-on-wet technique creates a dynamic effect. The technique creates a blend or mix of colors. But, how can you do wet on wet with acrylics?
You can do wet on wet with acrylics depending on your preference. However, since acrylics tend to dry faster, you may consider adding an acrylic retarder or more water to ensure that it works. How and when to use wet on wet with acrylics depends on the subject of your painting and the effects that you want to achieve.
The wet-on-wet technique makes the blending of colors easy. Just like oils, wet on wet painting technique can be used with acrylics. Unlike traditional painting methods, you can complete a painting at one time using the wet-on-wet technique. The painting technique differs based on the type of surface used, but the approach remains the same.
Table of Contents
- 1 Why Should You Try Wet-on-Wet with Acrylics?
- 2 What Will You Achieve from Using the Wet-on-Wet with Acrylics?
- 3 What Is the Effective Way to Apply Wet-on-Wet Painting Techniques on Acrylics?
- 4 Can You Mix Wet-on-Wet Painting Techniques with Other Painting Techniques?
- 5 What Are the Tips to Consider when Using Wet-on-Wet Techniques?
- 6 How to Paint in Layers when Using Wet-on-Wet Technique with Acrylics?
- 7 How Do You Apply Wet-on Wet Acrylic Painting Technique?
- 8 How to Blend Acrylic Paint?
- 9 What to Do if Your Paints Dry Faster?
- 10 What Supplies Do You Need When Doing Wet-on-Wet with Acrylics?
- 11 Sources
Why Should You Try Wet-on-Wet with Acrylics?
The wet-on-wet painting technique has great benefits. Using the technique with acrylics produces contrast effects on the painting. If you want to create a unique and dynamic blend of wet colors or paints, you should try the wet-on-wet technique with acrylics.

What Will You Achieve from Using the Wet-on-Wet with Acrylics?
Wet-on-wet technique with acrylics creates differing effects. Whether you want a mystery painting or defuse the colors, wet-on-wet will help you achieve great dynamic effects. One great benefit of this technique is that you don’t have to wait for your paint to dry. You can add another paint layer to the wet paint. Therefore, you can immediately see the results and the color blending that you have achieved.
To perfect your skill in color blending, consider getting more exposure and experience with the technique. This will not only help you in experimenting but also predicting your painting outcome. While experimenting, you can create your personalized chart.
A personalized chart is a great way to track colors and understand the outcome and predictions of colors. If it’s your first time trying this technique, you can make a lot of mistakes. However, you’ll get to learn from mistakes while familiarizing yourself with the technique. Exposure and learning depend on your readiness to learn and cope with mistakes, successes, and experience.
What Is the Effective Way to Apply Wet-on-Wet Painting Techniques on Acrylics?
Wet-on-wet painting technique with acrylics can be applied in many ways. The technique has unique characteristics. If you want to get a new look to your painting, consider adding another painting medium . Adding a painting medium will help you manipulate your painting’s unique characteristics.
With the many processes of applying wet on wet painting techniques, choose one that will be easy and convenient for you. For instance, if you want to add a thin paint layer to your painting, use the same technique as that of watercolors. A thick layer, on the other hand, uses the same technique as oil plants.
Always remember that when working with acrylics, you can add water to the water-soluble if it is thick. Since acrylics dry faster, thick soluble may become permanent on the painting surface. To avoid this, when using the wet-on-wet painting technique, be fast before they dry.
Can You Mix Wet-on-Wet Painting Techniques with Other Painting Techniques?
If it’s your first time using wet-on-wet painting technique with acrylics, then it’s not a good idea to mix the technique with other painting techniques. However, if you have enough experience with the technique, you can integrate other painting techniques. From basic to master painting techniques, you can mix any other technique with wet on wet painting technique to get your desired outcome.
What Are the Tips to Consider when Using Wet-on-Wet Techniques?
Use medium or heavyweight paper
If you want a thin layer, you may use the same technique as with watercolor. Consider the type of paper or support that you want to paint before starting the painting process. When using water-soluble, use the paper that’s required for the purpose.
A medium heavy paper should be 140 lb while heavyweight should be 300 lb. By using a thinner paper, you may not get your desired outcome. Also, consider that the paper has some texture to it.
Colors
The wet-on-wet technique involves using a mix of colors. Before starting the process, plan what colors you want to intermix to avoid creating an unwanted intermix. You can create your color palettes. Good planning on the colors will give striking visual effects. Avoid planning the color palettes after the process.
Use clean water
For any painting technique, dirty water should not be used since it will affect the paint colors, which may appear dirty. Acrylics dry faster; hence you have to work faster. When using the wet on wet painting technique, a lot of water is used. Hence, you have to be fast to create beautiful effects.
Avoid dipping your paintbrush accidentally into dirty water. To avoid this, use two or three cups of water. For instance, you can use one glass of water to rinse color from your brush and the other for dampening. Whether you’re using this approach or any other, make sure that you check the water frequently throughout the process.
Consider how much water is on your paper and brush
When using the wet-on-wet technique with acrylics, the outcome depends on the wetness/dampness of your paper or canvas and how thick or thin your paint mixture is. If you’re a beginner, consider having a range of paint mixtures. Experiment with the mixtures to see the outcome. For instance, you can make translucent, water, heavy, or thicker color mixtures. Place them differently on slightly dampened paper and a heavily dampened paper to see the outcome.
If your paper is very wet, avoid layering it with a thin paint mixture. To avoid back runs, remember that your brush should have less water than water in your painting. Also, let your paint layer dry before adding another color. If you accidentally wet your paper with too much water, absorb the excess water with a clean brush.
Know when to stop
It is important to note that wet paper is fragile. Therefore, you have to leave it for some time for it to regain its strength.
How to Paint in Layers when Using Wet-on-Wet Technique with Acrylics?
The wet-on-wet technique captures a rich depth and texture. Layering creates depth and a slight color shift. While using the wet-on-wet technique, layering might not be ideal since you may end up with an undesirable outcome.
While using the wet-on-wet technique with acrylic, first, pour your acrylic color onto a canvas. Then, pour another color while the acrylic is still wet. This will ensure that the colors mix. While still wet, you can add colors and mediums until you’re done. This process is effective in painting and layering at one time.
As compared to using oil paint or watercolor, acrylics don’t require an in-depth plan. Acrylic paint or medium can be mixed to make wet mixtures. The mixture can be applied over or under a layer. Therefore, it offers flexibility.
You can start with either diluted or undiluted acrylics, then add mediums and acrylic products. While layering, one advantage of acrylics is that it sticks to itself. When using non-acrylic materials with acrylic, factors such as adherence and the type of material are important to consider.
Transparency is important when layering. If you want a crusty surface, apply thick and opaque layers. If you don’t want to achieve this, each layer should be visible.
How Do You Apply Wet-on Wet Acrylic Painting Technique?
After applying mediums or paints on a painting surface, it remains wet for a while before drying. This layer is considered the first layer of paint. The time for the layer to remain wet depends on environmental factors, the type of medium or paint used, and the thickness of the paint or medium.
While the first layer is still wet, add a second layer of paint by adding more paint or medium. Using this method will help you create transparency and achieve soft edges.
Soft melted effect
You’ll need acrylic paint colors, primed painting surface, acrylic gel, paintbrush or knife, water, water container, and paper towels. If you don’t have paper towels, you can use rags.
The steps below explain how to achieve a soft melted effect:
Underpainting
First, use your preferred style to paint an underpainting on a surface.
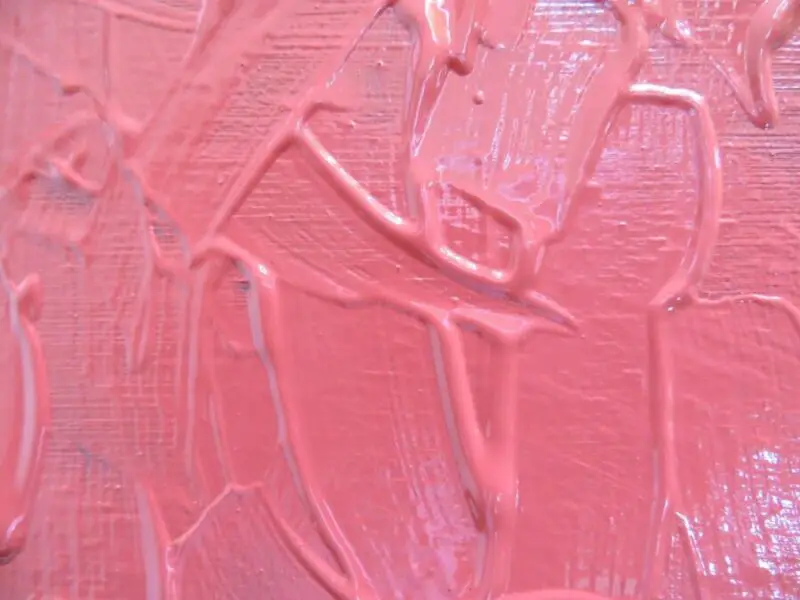
Apply thick gel
Choose an acrylic gel that will help you achieve your desired outcome. The matte gel gives cloudy or veiled results, while gloss gives a transparent outcome. Using your preferred spreading tool, apply a thick gel on the painting surface. The gel should be a quarter inch in depth.
Paint into the wet gel
Use a knife or brush to apply your choice of color on the wet gel. If you want a smoother surface, use a heavier gel. On the other hand, the softer gel gives a texture to a painting.
Fix the edges
Use a clean knife to move the edges smoothly by pushing the color into the gel layer. If you’re not satisfied with the results, move the paint until you get satisfied. After drying, the painting will visually emerge.
How to Blend Acrylic Paint?
Blending acrylic paint involves mixing two or more colors to create a new color. It’s a great technique for getting vibrant results.
To blend acrylic paint, you need acrylic paints, surface, palette, wash brush, and water. The three techniques for blending acrylic paint are circular wet on wet blending, horizontal wet on wet blending, and double load wet on wet technique.
Circular wet-on-wet blending
It involves blending colors in circular motions. If you want to achieve a painting with the lightest colors and darker colors on the outer side of the circle, then this technique is a great option.
Horizontal wet-on-wet blending
It’s commonly used when painting sunsets, skies, or filling the background. This technique is effective in painting a sky that has a sunset.
Double load wet-on-wet technique
This technique involves loading the brush with two colors and using them to blend. It’s an excellent option for achieving a two-toned abstract area. It’s a simple technique but efficient in achieving a lovely and engaging background.
What to Do if Your Paints Dry Faster?
Acrylics tend to dry faster. To avoid this, you can spray your palette with a fine mist to slow down the drying time. Lastly, you can use a mix of the slow dry medium in your point.
What Supplies Do You Need When Doing Wet-on-Wet with Acrylics?
Slow drying mediums
If you have open acrylic paints and a slow drying medium, you don’t have to mix them. Choose one that will work best for you.
Slow drying mediums are economical. Rather than getting a set of open acrylic, mediums are long-lasting and a cheaper option.
The types of slow drying mediums are open medium, fluid retarder medium, and glazing medium.
Open medium is effective in slowing down the drying time. It can extend the working time to 3 hours. There’s a range of options of open mediums. Choose one that will help you achieve your desired effect.
Fluid retarder medium
It’s a great option for wet on wet painting technique. While open reduces the drying time by 3 hours, fluid retarder reduces by 50%. When working with a fluid retarder, ensure that you don’t mix more than 25% into the paint.
Glazing medium
It’s a great option for creating transparency. If you want a blended appearance, the glazing medium is the option to choose. It also reduces the drying time.
Sources
Wet-on-Wet Painting: Art Glossary Definition