
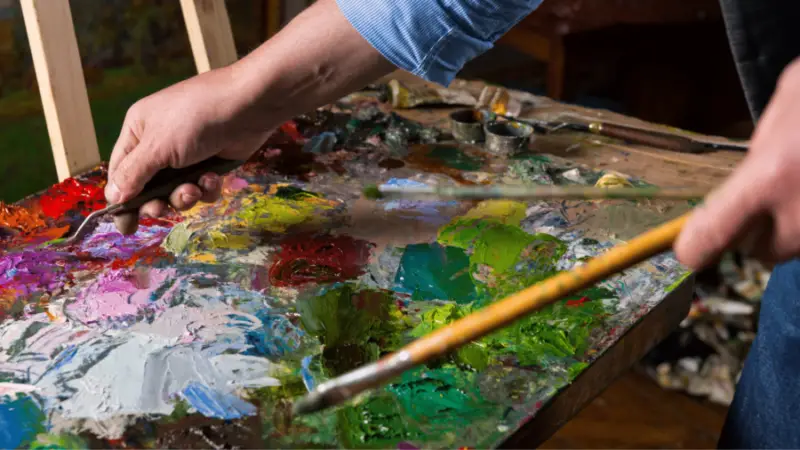
Blending oil paint is a simple technique that anyone can master with practice. It is often used in artworks that depict a landscape or natural scenery. It is also commonly used for more realistic paintings.
To blend oil paint, choose the colors you want to combine and paint them in opposition. Then, mix the two colors on a palette and paint this color in the gap between the two contrasting colors. Wash your paintbrush and start blending each side with the mixed color in the middle.
You can also blend colors to achieve a light to dark or dark to light effect. It is also great to practice blending different hues of the same color, for example, dark blue to a lighter blue. In this article, I’ll discuss in detail what you can do to become a master  at blending oil paints to answer the question on How To Blend Oil Paint.
Table of Contents
What Does it Mean to Blend Oil Paint?
Blending is a technique that is used to blend colors subtly. Oil paint is one of the best types of paint to use for blending because it takes much longer to dry than other kinds, like acrylic, for example.
This means that you can take your time and focus on perfecting the blending process. You may recall seeing this technique applied to more realistic artworks, especially landscape artwork, also known as natural scenery.
Advantages of Painting with Oils
As with all mediums in art, oil paint comes with its unique advantages. We’ll break these down here.
Flexibility
One of the top reasons why artists enjoy using oil paints is because it is so flexible; it can take two days the earliest, and possibly surpass the ten days! That makes blending, “fixing” happy mistakes, and the chance to change your mind more achievable.
Oil paint is also excellent because it gives you the flexibility to use various techniques, including glazing, impasto, and Alla Prima. These are 3 of the most popular approaches to use in oil paintings.
Impasto is a technique used to achieve a 3D effect. Oil paint is preferred for this technique because of its thick consistency. Oil paint can also be blended with linseed oils to change the thickness of the paint and achieve the desired texture.
Color Richness
Oil paint is known for its colors being vivid and deep. There is also a range of color choices for oil paints, and artists are spoilt for choice when it comes to the style they want to paint, whether that’s realism or a less realistic style like impressionism.
Durability
Oil paintings have stood the test of time because the medium is so durable. However, there is a technique to make oil paintings last longer. This usually includes using linseed oil to mix oil paints. The linseed oil helps to preserve the oil paint and prevent it from cracking in the distant future.

How to Blend Oil Paint
Blending oil paint well takes practice and using the right techniques. This also includes understanding color and how to mix different colors effectively. I’ll detail everything you need to know to become an excellent oil paint blender in this section!
Understanding Colors
Before you can start blending oil paint like a pro, you’ll need to play around with mixing different colors. Blending depends on choosing and combining the correct colors, and if you aim to use blending to achieve realism, it is even more critical that you understand how to mix and blend oil colors.
Color Palette for Beginners
If you’re at the start of your journey with oil painting, then there are a few colors that you’ll want to start with. You’ll want to start with a limited range of colors and expand these options as you become more confident.
When you’re starting, the best ones to go for are Ultramarine blue, Phthalo Blue, Cadmium Yellow or Lemon Yellow, Cadmium Red, Alizarin Crimson, Viridian Green, Burnt Umber, Dioxazine Purple, Titanium White, and Ivory Black.
What Are Primary Colors?
You may already know that the primary colors are yellow, blue, and red. These are called ‘primary’ because, unlike other colors, you cannot blend other colors to get them. Instead, you can blend primary colors to get a range of different colors.
What Are Secondary Colors?
When you mix different combinations of your primary colors, you’ll get your secondary colors. For example, if you mix blue and red, you’ll get purple. Mixing yellow and blues makes green, and combining yellow and red gives you orange.
The beauty of oil paints is that you can play with your primary colors to make various secondary colors. For example, there are many different types of orange. The key to understanding color mixing lies in knowing that you can alter the vibrancy or kind of color.
We call this the hue in art. You’ll also learn that to get more realistic hues. You may mix more than one primary color or secondary color.
What Are Complementary Colors?
It’s imperative to understand complementary colors when mixing paint like a pro and beautifully blending oil paints. That’s because some colors go well together with other colors. For example, light blues and dark blues blend well, or greens go well with blues.
You may have heard of complementary colors already, like blue-green or red-purple. It is important to remember that working with complementary colors becomes more technical as you work towards painting realistically. It takes lots of practice to understand color mixing fully.
Selecting the Right Paint Brush
Okay, so we’ve talked about color. The following important consideration is your paintbrush. There are different types for different effects. I’ll go into detail in this section about which brush to choose for which effect.
Going for Quality
The quality of your paintbrush makes a considerable difference to your artwork. You want to avoid buying brushes where the bristles split or spread too much. Another issue with cheaper paintbrushes is that the bristles may come loose and get stuck in your oil paint. You’ll want to make sure that the paintbrush you buy is a recommended or trusted brand.
You can test the quality of the paintbrush by checking its ‘spring.’ Brush it against your hand to see how the bristles respond. This is a good indication of how the brush will respond to your strokes.
Choosing the Right Shape
While there are so many shapes of paintbrushes to choose from, I’ll talk about the right ones to use for blending. With the wrong brush, it will be a lot more challenging to achieve your desired technique.
When it comes to blending, your go-to is a Filbert paintbrush. This is an oval-shaped brush with a thick ferrule (the metal part), and the hairs on the brush are medium to long. This allows you to have a good sense of control with each stroke.
Applying the Technique
Okay, so I’ve discussed all the basics that you’ll need to know to prepare for your blending session using oil paints. Now let’s talk about how to apply this technique and become a master blender!
Practice Blending Colors
The first thing you’ll want to do is practice blending techniques with different colors on a piece of paper or cardboard before doing the actual painting. The key to becoming good at color mixing is to be bold and just go for it.
The more you try out different combinations, the more you’ll discover which color mixes work well and the ones to avoid. Use complementary colors, and you can also practice blending with different hues of the same color, like dark blue and light blue, for example.
Practice Shading and Tinting Techniques
Blending isn’t only used for natural sceneries. It can also be used to contrast light and dark. Blending is used to achieve realism in many paintings and can also work to create a dramatic effect.
Once you’re familiar with blending different colors, start practicing adding white for tinting and black for shading. You can also mix black and white to get grey and then practice blending with it too.
Applying the Technique
So by now, you might’ve practiced blending different colors and shades. Now it’s time to practice the actual technique. Blending is effortless, and the effectiveness lies in the colors you choose, so understand how colors work together.
Realistic artwork involves blending a range of colors and tones. When you start, though, it’s best to use two colors. To start, paint an area on opposite sides of each color, and leave a gap between the two.
The colors should be parallel to one another. Then, mix the two colors you used on a palette or clean, dry surface. This will get the color that the two colors make once they’re blended. Paint the gap between the two colors with the mixed color.
Finally, proceed by blending each color with the mixed color but make sure to wash your paintbrush before doing the blending! This is one way to practice blending. Another method involves blending from light to dark or vice versa. For example, you can practice blending dark blue to light blue and then to white.
Richard Stanley has done a gorgeous step-by-step on how he blends his oil paintings; it is worth a look for a more visual example from the Tasmania artist: How to blend colours with oil paint.
Other Techniques Using Oil Paint
The benefit of using oil paints is that there are many techniques to try out. Testing and mastering each one is an excellent way to find your unique painting style. I’ll briefly talk about the different types that you can do with oil paint.
Alla Prima
This technique involves painting many layers of paint. You continue painting layers over wet paint. It’s a technique that allows an artist to complete artwork in one go. Although it sounds messy, when you master this technique, it can make for some brilliant artwork.
Scumbling
This technique involves using oil paint without thinning it down and when it is slightly dryer. It creates a rough texture. You also use a rough paintbrush and apply thin layers of paint at a time.
Impasto
When you use this technique, you are aiming to make your brush strokes visible. It involves applying a thick amount of paint with no blending. This means that colors are often mixed directly on the canvas.
Chiaroscuro
This is a technique used to create dramatic pieces. It involves a play of dark and light. The best way to successfully carry out this technique is by starting with the light source and working your way towards the darker areas.
Glazing
Glazing is a technique where transparent or “see-through” paint layers are applied over an opaque background. This more advanced technique can be used to add dimension to an artwork. It is also applied to add shine to some paintings, for example, when you’re painting fruit.
Need Inspiration?
A great way to get inspiration is to look at artworks using these different techniques. Some artists choose to paint in the same style. There are many famous oil paintings that you can look at. Personally, this YouTube video on Basic Oil painting Blending Approaches by KevinMcCainStudios has been a mind opener before I even try and grab my materials.
Artists Vincent Van Gogh and Claude Monet used alla prima in their artworks. Impasto has also been used widely by famous artists along with alla prima. If you’d like an example of artwork using scumbling, you can look at works done by artist JMW Turner. Rembrandt is an artist who used glazing in his paintings. Chiaroscuro was a technique used by Leonardo da Vinci.
Final Words
Becoming a master at blending and other techniques using oil paint comes down to making sure you understand the basics of color and have the right tools, meaning good quality paint and brushes. Also understanding more about the characteristics of the material will be fundamental. For example, it is very important to let oil paintings breath, as it dries through oxidation, or simply understanding how the blending works. Finally, becoming a great oil painter means practice! The more you do it, the better you’ll become, and one day, you’ll have your style of painting.