Creating texture and depth in acrylic paintings can be challenging when working with smooth, flat surfaces. The lack of dimension often leaves artwork feeling incomplete, missing that extra layer of interest that truly makes it stand out.
This problem is made worse by the limitations of store-bought texture pastes. They can be costly, difficult to customize, and might not always provide the effects you’re looking for. As an artist, this can be incredibly frustrating, stifling your creativity and leaving you searching for better options.
But there’s a way to break free from these limitations. By learning How to Make Texture Paste for Acrylic Paint on Canvas using simple materials like baking soda, baby powder, or plaster of Paris, you can fully control the texture and depth of your paintings, bringing your artistic vision to life with ease.
Table of Contents
- 1 What Is Texture Paste for Acrylic Paint?
- 2 What Does it Mean to Use a Canvas for Textured Art
- 3 Why Make Your Own Texture Paste?
- 4 Key Materials for Homemade Texture Paste
- 5 Materials You’ll Need
- 6 Step-by-Step Guide to Making Texture Paste
- 7 How to Apply Texture Paste on Canvas
- 8 Allow the Plaster to Dry
- 9 Creative Ideas for Using Texture Paste in Acrylic Art
- 10 Common Mistakes to Avoid
- 11 FAQs
What Is Texture Paste for Acrylic Paint?
Texture paste for acrylic paint is a versatile medium that artists use to add dimension and tactile interest to their work. It’s a thick, moldable substance that can be applied to a canvas to create raised, textured surfaces, transforming a flat painting into a dynamic, multi-dimensional piece.
When using texture paste with acrylic paint on canvas, you have the freedom to experiment with various techniques, from creating smooth, sculpted forms to rough, gritty effects. This flexibility makes texture paste an essential tool for artists who want to push the boundaries of their work.
While store-bought options are available —such as Liquitex —, many artists prefer to create their own texture paste at home. This allows for greater customization and control, ensuring the paste perfectly suits their specific needs. Understanding what texture paste for acrylic paint is and how to use it effectively on canvas can significantly enhance the depth and impact of your artwork.
Before you make a mixture that you are not sure you will use, there are other techniques you can attempt first; we talk about some of them in our article How to Create Textures with Acrylic Paint: A Guide for Artists .
.

What Does it Mean to Use a Canvas for Textured Art
Applying texture paste to canvas has several unique aspects that set it apart from other surfaces:
1. Surface Flexibility
Canvas is a flexible surface, which means it can stretch and bend. This flexibility impacts how texture paste adheres and dries. Unlike rigid surfaces, a canvas might shift slightly, potentially causing cracks in the paste if it is too thick or applied too heavily. To mitigate this, use a more pliable texture paste recipe or mix it with a gel medium to enhance flexibility.
2. Absorption and Adhesion
Canvas can absorb some of the paste, which influences the paste’s adhesion and the final texture. Priming the canvas with a layer of gesso before applying the paste helps seal the surface, reducing absorption and improving the paste’s adherence. Gesso also creates a more even texture and can prevent the paste from soaking in too quickly.
3. Application Techniques
The way you apply the paste can vary based on the desired texture and effect. Common tools include:
- Palette Knives: Ideal for creating bold, sculptural textures.
- Spatulas and Trowels: Useful for spreading paste over larger areas and achieving smoother textures.
- Brushes: Can be used to create fine details or patterns in the paste.
- Stencils: To imprint designs or shapes into the paste for added texture.
4. Drying and Curing
Texture paste on canvas requires careful attention to drying times. The paste should be allowed to dry thoroughly before painting on top. The drying time can vary depending on the thickness of the paste and the environment (humidity, temperature). Ensuring the paste is fully dry prevents issues like smearing or peeling.
5. Flexibility for Modifications
Canvas allows for easier modifications and adjustments. You can manipulate the texture paste while it is still wet to create different effects, such as smoothing out areas or adding additional layers. Once the paste is dry, it can be sanded lightly to smooth out rough spots or to integrate it better with surrounding paint.
6. Impact on Paint Application
The texture created by the paste affects how subsequent paint layers interact with the canvas. Textured surfaces can alter paint application, leading to varied effects like enhanced texture visibility or different paint absorption rates. Experimenting with different paste consistencies and application methods can help achieve the desired artistic outcome.
Pro-Tip: Don’t Skip Prepping Your Canvas
Prepping your canvas is crucial for successful textured art. Start by applying a base coat of paint with a brush or roller to create a smooth surface for your texture materials. A neutral color like white or black works best to highlight the texture. Allow the base coat to dry completely, which can take several hours depending on paint thickness and humidity.
Why Make Your Own Texture Paste?
Creating your own texture paste offers numerous benefits:
- Creative Freedom: Experiment with different textures without worrying about cost.
- Cost-Effective: Homemade paste is much cheaper than store-bought options.
- Customizable: Tailor the texture to your specific needs.
- Eco-Friendly: Use sustainable materials and practices.
Key Materials for Homemade Texture Paste
I have personally only experimented with creating paste with the first three products, but I have done some research online on what other products you can use. Sources will be linked for each one to make sure you can access all the information you need for them.
Materials You’ll Need
You need a mixture of a texture agent with a binding agent to create paste for canvas to paint with acrylics because each component serves a critical function that ensures the paste performs well both during and after application.
- Texture Agents: Baking soda, baby powder, cornstarch, plaster of Paris, gypsum, powdered marble, or gesso with sand.
- Binding Agent: Acrylic medium or white glue.
- Optional: Water for thinning.
- Tools: Mixing bowl, spatula, airtight container, silicone mat
 (optional).
What is a Texture Agent?
This is the material that gives the paste its body and texture. These materials provide the bulk and the physical characteristics —such as smoothness or grit— that contribute to the final texture of the paste.
What is a Binding Agent?
The binding agent, often white glue, acrylic medium, or even gesso, is what holds the texture agent together. It gives the paste its adhesive quality, ensuring that it sticks to the canvas and doesn’t crumble or fall off as it dries. Additionally, the binding agent helps the paste remain flexible enough to move with the canvas, preventing cracks or brittleness that could occur over time.
Do I Need Something Else to Make Homemade Texture Paste?
In addition to the texture and binding agents, you may need a few more items to create homemade texture paste effectively. Water can be used to adjust the paste’s consistency if it’s too thick. Essential tools include a mixing bowl for combining ingredients, a spatula for thorough mixing, and an airtight container to store your paste. A silicone mat is optional but useful for mixing and cleanup. These tools and extras help ensure that your texture paste is well-mixed, has the right consistency, and can be conveniently stored and applied to your canvas.
Step-by-Step Guide to Making Texture Paste
Step 1: Measure Your Ingredients
The ratio of texture agent to binding agent will significantly impact the final consistency and workability of the paste. Start by deciding which texture agent you’ll use—baking soda, baby powder, cornstarch, plaster, or any other material you’ve chosen based on the desired texture. The ratios vary depending on the material, but a typical mixture might include:
- Baking Soda: 6 parts baking soda, 2 parts glue, 3 parts white acrylic paint.
- Baby Powder: ¼ cup baby powder, 1 tablespoon glue, 1 tablespoon matte acrylic paint.
- Cornstarch: ¼ cup cornstarch, 1 tablespoon glue, 1 tablespoon acrylic paint.
- Plaster of Paris: 2 tablespoons plaster, 2 tablespoons glue, 1 tablespoon white acrylic paint.
- Gypsum: 3 parts gypsum, 1 part water, 1 part glue, 1 part acrylic paint.
- Powdered Marble: 2 parts powdered marble, 1 part acrylic medium, splash of water.
- Gesso with Sand: Mix gesso with fine sand until desired consistency is reached.
Step 2: Mix the Ingredients
Combine the texture agent with the binding agent. Mix thoroughly until you achieve a consistent paste. Adjust the consistency by adding more of the dry ingredient for a thicker paste or a bit of water for a thinner mixture.
Step 3: Adjust Texture Based on Your Project
Depending on the look you’re aiming for, you can adjust the thickness of your paste. A thicker paste will create more pronounced textures, while a thinner one will be smoother.
Step 4: Store Your Texture Paste
Store your homemade paste in an airtight container. If stored properly, it can last several weeks.
 : DIY Texture Paste
How to Apply Texture Paste on Canvas
For basic application, a palette knife is a versatile tool that works well for spreading and sculpting the paste. It offers precision and control, making it ideal for creating textured patterns and adding intricate details. You can also use a spatula or old credit card for different effects, such as scraping or smoothing the paste.
If you prefer a more controlled approach, consider using a stencil to apply the texture paste. This technique involves placing a stencil on the canvas and spreading the paste over it, creating a defined pattern once the stencil is removed. A wide, flat brush or a small roller can also be used to apply the paste, particularly when working on larger areas or for more uniform textures. These tools help in achieving different textures, from smooth and subtle to coarse and pronounced.
Allow the Plaster to Dry
Knowing when your texture paste is dry enough to start painting on top of it is crucial for achieving the best results in your artwork. Here are some practical tips to determine if your paste has fully dried:
- Time Consideration: Generally, texture paste takes about 24 hours to dry completely, but this can vary based on the thickness of the layer and the type of paste used. Thin layers might dry faster, while thicker applications or higher humidity can extend the drying time. Always refer to the specific instructions for the texture paste you’re using.
- Environmental Factors: Ensure that your workspace is well-ventilated and at a consistent temperature. High humidity or cool temperatures can slow down the drying process. Ideally, the paste should dry in a well-ventilated area at room temperature.
- Touch Test: Gently touch the surface of the texture paste with your fingertip. If it feels cool or damp, it is still wet and needs more time to dry. When it is fully dry, it should feel cool but no longer wet or sticky to the touch.
- Visual Check: Look for changes in the paste’s appearance. Dry paste will typically look matte and solid, with no sheen or wet spots. If you see any glossy areas, it indicates that the paste is still drying.
- Drying Test: If you’re unsure, lightly press a clean, dry brush or tool against the surface. If it comes away clean and the texture paste doesn’t shift or smudge, it’s likely dry. For thicker layers, you might need to wait a bit longer.
Creative Ideas for Using Texture Paste in Acrylic Art
Texture paste can be sculpted and shaped to mimic natural elements, geometric patterns, or abstract forms, enabling you to bring your artistic vision to life in a unique and engaging way. Whether you’re aiming to add dramatic contrast or delicate detail, texture paste offers endless opportunities for experimentation and innovation. You can use texture paste to create:
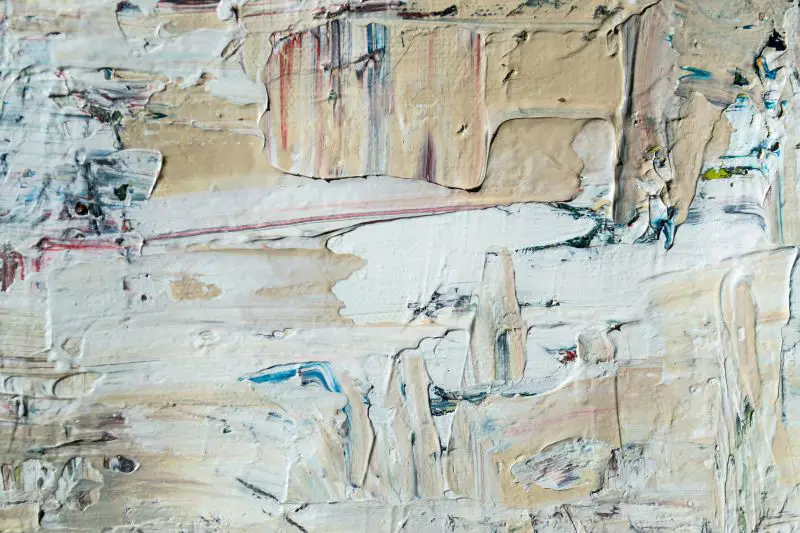
- Impasto effects: Apply thick layers for a three-dimensional effect.
- Raised patterns: Use stencils to create detailed designs.
- Abstract designs: Experiment with different application techniques for unique textures.
We encourage you to try and make this mixture at home, as part of a sustainable practice – particularly when you are experimenting and you don’t want to spend money on something you are not sure you will like. We have other thoughts on this in our article How to Reduce Waste and Create Beautiful Art with Everyday Items .
.
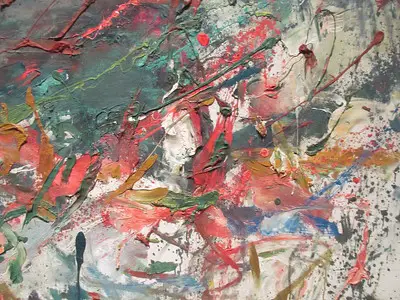
When it comes to figuring out how do I want my work to look like, I research people that have used similar materials and have created artworks that I find appealing. Although the pigment is oil, one example of using paste to create texture is this Untitled Joan Mitchell (1960), currently at the Nevada Museum of Art .
.

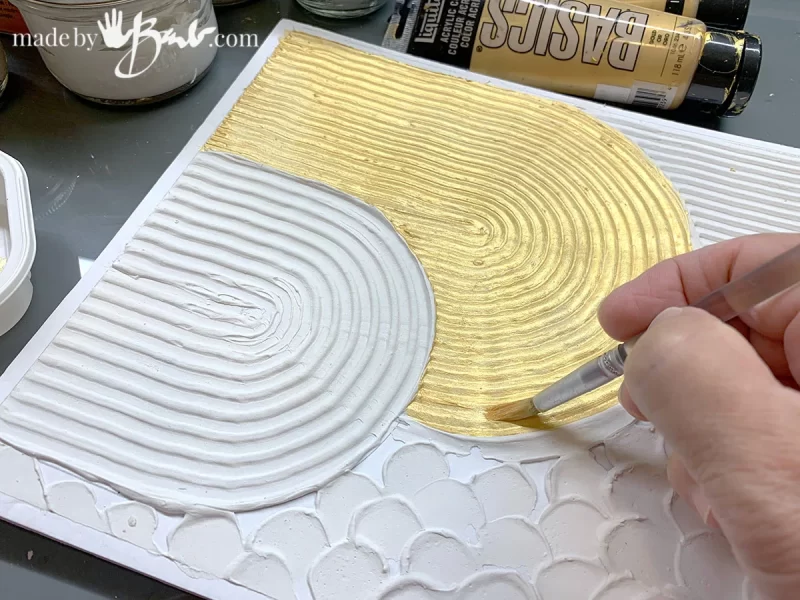
Some more recent artworks that I have found just using the plaster have been Made by Barb , using geometrical designs in an ingenious and pleasing way, applying Liquitex BASICS Acrylic Paint Gold
 to give it that minimalist yet shiny finishing.

Highly recommend Barb’s website, particularly the article from which this image comes from: How to make Modern Geometric Textured Art .
.
Common Mistakes to Avoid
- Cracking: Avoid by not applying the paste too thickly or by adding glue for flexibility.
- Over-thinning: A too-thin paste won’t hold its shape.
- Uneven application: Ensure a consistent mix for even textures.
FAQs
- Can you paint over texture paste? Yes, but ensure it’s fully dry before painting.
- How long does homemade texture paste last? When stored in an airtight container, it can last several weeks.
- What’s the best texture paste recipe for beginners? Start with a simple recipe using baking soda, glue, and acrylic paint. This mixture is easy to work with and offers a gritty texture.
By following this guide, you’ll be able to create texture pastes that enhance your acrylic artwork, providing depth and dimension that will make your pieces stand out. Don’t be afraid to experiment with different materials and techniques to find the perfect texture for your canvas.

