
Oil based paint has been in use for decades, and many artists love using it because it has good gloss, it provides good adhesion, and it is durable. Oil paints are easy to use, and it needs to be mixed with solvents. So, what should traditional oil paints not be mixed with?
Traditional oils should never be mixed with water because oil and water do not mix. Oil paint, when mixed with water, will only make your paint cloudy and messy. Use solvents meant for oil paint, such as turpentine. You should also not mix baby oil with your oil paint because it does not dry easily.
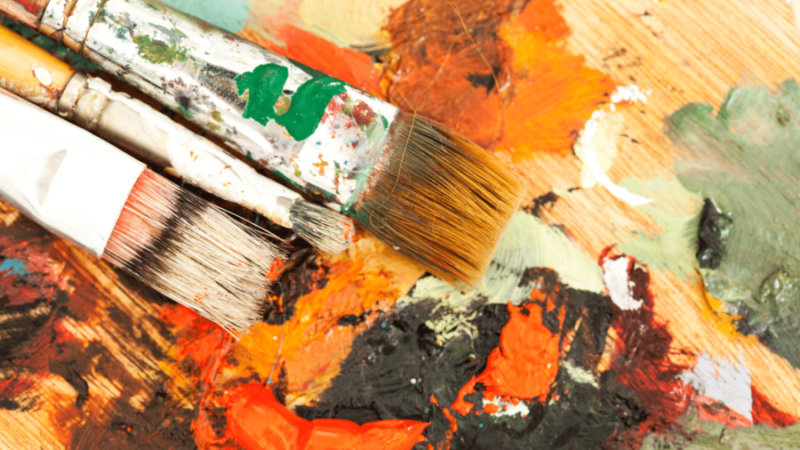
The most basic solvents that you can use to mix oil paint are mineral spirits and turpentine. The molecules in oil paint can only be broken down using the two solvents. Acetone can also be mixed with oil paint , and you can find it in most nail polish. Solvents can also be used to clean your brushes. Keep reading to find out What Should Oil Paint Not Be Mixed With?
Table of Contents
Can You Mix Olive Oil with Oil Paint?
Although some people say that olive oil can be mixed with oil paint, things always go down very rapidly. Olive oil should never be mixed with oil paint because it is a non-hardening oil. Olive oil never dries, and it will cause a lot of problems with your artwork.
Olive oil can ruin your art if you try applying different layers together. Due to its non-hardening feature, olive oil can cause your painting to smear and smudge in the process. Always ask for advice from seasonal artists before mixing olive oil with paint.
Why You Should Never Mix Olive Oil with Oil Paint
Olive Oil Reacts with Canvas
Many people typically refer to this process as the rotting effect, but it is actually not rotting. The chemical reaction is what weakens the bonds on your canvas, causing it to fray. This reaction not only applies to olive oil but also happens with other mineral oils.
The worst part is that many people who mix olive oil with oil paint will never notice the chemical reaction on their canvas until it’s too late. Immediate signs can be detected on the strands of the canvas, but if you are not keen, you will never realize it. The canvas strands can sometimes appear frayed, or they will get thin.

Olive Oil Yellows Rapidly
Most popular oil paint mediums are typically refined, but I have never heard of refined olive oil. Olive oil has all its components intact, and that is why it yellows very quickly when used with oil paint. The yellowing process can start as early as a week, depending on the type of olive oil.
Although other low-quality mediums will also quickly speed up the yellowing process, olive oil tends to add a yellow tint to dark colors. This means that your artwork will have a yellow look once complete. The bottom line is that olive oil cannot be used as a painting medium.
Olive Oil Forms Film
Olive oil starts typically oxidizes with time, and in that process, a thin layer of film will start to form on your paint. Oxidation followed by yellowing will eventually cause dull colors. However, this does not happen with all types of olive oil.
History of Color Mixing
Most artists in the past had minimal oil color palette at their disposal, but they still created beautiful pieces of art. This was because it was challenging to find pigments back then. That is when artists decided to be more innovative and started using what was available.
They started to mix different pigments in small amounts in the hope that they would get new colors. Unfortunately, this process did not see the light of day. Industrialization started, and many factories began to manufacture pigments of different shades.
Knowing how to mix your colors will give you a deeper understanding of color harmony. You will get to know the different properties found in colors and how they work together. As an artist, you can discover new preferences and styles that you can work with.
What You Need to Know About Mixing Oil Paint
Start with A Mixture of Two to Three Colors
If you plan to work on a single paint mixture, I recommend you start with a minimum of two and a maximum of three colors, and this does not include the whites. When you mix many different colors, you will have a dull, muddied, and lifeless hue.
It is advisable to use as few colors as possible. This applies especially to people who love working with dark colors. Always remember to add new colors gradually so that you can easily control the tone, tint levels, and shade of your mixture.
Use Eco-Friendly Solvent
After mixing oil paint, it is always good to clean your brushes and the palette knife to prevent color contamination on your next project. You can dip your brush in an eco-friendly solvent. Nowadays, you can find eco-friendly solvents in most art stores.
For the palette knife, you can use a rag to clean it. If you cannot find a rag, you can simply find an old T-shirt and tear a small piece suitable for your painting needs. Always make sure that the area you are working in is clean and tidy. This will prevent your solvent from getting dirty.
Start from Light to Dark
Light colors include Naples yellow, Titanium white, or zinc titanium, and dark colors include raw umber or yellow ochre. Start with a generous amount of light followed by a small amount of dark. This is because dark hue oil paint usually has great tint power compared to light ones.
Mix the two colors as you gradually add small amounts of dark hue to the light one. Make sure not to use too much dark color. Continue mixing them slowly and steadily until you get your desired color shade.
Have A Sketchbook
Having a color journal that is suitable for oil paint is very important when you are painting. If you want to mix two colors, you can start by dabbing them on your sketchbook and see how it looks before seeing the actual painting. It will give you a picture of what to expect.
Always have a record of the different colors you mix in your journal book for future color mixing guides. I always recommend you remove the page and let it dry before piling them together. Make sure you place them when your children cannot reach them.
Always Use a Palette Knife
It is always recommended to use a palette knife whenever you are mixing colors. Yes, you can use your brush to mix, but if you are dealing with a significant amount of paint, the bristles on your brush will start to wear off. Ensure that you do not overload your brush.
When using a brush to mix, you should not allow the paint to go beyond the ferrule. If that happens, it will be difficult for you to clean your brush. So, if you want to be on the safe side, you should simply use a palette knife. It is easy to use and will make your work much more manageable.
Change Your Brushes
When you start painting, you can end up using different brushes for different colors for various reasons. If you want to use new and fresh colors, it is best to change your brush and clean the one you just used. Using a new brush will give you better brushstrokes, and your work will not be muddy.
As an artist, you need to have a set of brushes because not all of them are the same. Some brushes are used for the start, others for toning and shading, while others are used for finishing. So always ensure that you change your brushes when mixing color and also when painting.
Use Fat Over Lean Rule
Oil paints are typically classified as fat, while acrylic, watercolor, and gouache paints are water-soluble. The rule of thumb is that fat layers must be on top of the lean/thin layers when it comes to painting. This happens because of the different drying processes.
Assess Your Working Surface
Oil painting can be done on different surfaces such as canvas, paper, or even cardboard. If you are using canvas to paint the sky, you will need to mix more paint. This is very true because I have experienced it personally.
You never want to run out of paint because you did not do your research. It is not easy to reproduce the exact same color you got initially. This might end up destroying your entire artwork. So, it is always good to know the surface you are working with before mixing oil paint.
When you have multiple layers, the thin layers will start to dry before the fat layers on top. The higher the oil content in paint, the more flexible it will be. This means that you should always use acrylics for underpainting and oil paint for the top layer. This is actually convenient, considering that acrylic is cheaper than oil!
Take Precaution
Always make sure that you protect yourself when handling different solvents and mediums while mixing your colors. Those properties can be harmful to the environment and your health. Breathing vapor from solvents can have a diverse effect on your eyes and respiratory tract.
Because of the many health hazards that can occur when mixing colors and solvents, I highly recommend that you use non-toxic and eco-friendly alternatives. There are plenty of options that you can purchase from the art store. Alternatives include Turpenoid natural, citrus oil thinner, and bristle magic.
Which Oils Are Best for Oil Painting?
In simple terms, oil paint is simply oil and pigment mixed. The two work together to provide you with color that can easily be spread to make a masterpiece. The texture and color will depend on how much oil and pigment you use. Let us look at some oils used in oil painting.
Linseed Oil
This oil base is perhaps one of the most commonly used oil types that makes oil paint. Most people like it because it comes in varying forms, and it has better drying effects. Linseed oil comes in different forms, including stand and cold-pressed oil. It is known for its consistency.
Safflower Oil
Safflower oil is the second most famous oil base used in oil paint. It is smooth and less thick compared to linseed oil. This oil is versatile because it provides the perfect balance between rough and smooth textures. Safflower oil is pale and works better with some colors.
Poppy Oil
Many people usually are surprised to know that poppy oil can be used as a paint base. This oil will make your paintings smooth and provide an easy flow. Poppy oil is thin and smooth, and this can be a challenge to new artists.
If you are a beginner, you will need to be very cautious when using this oil to avoid making your work messy. Just in case you make any mistakes, you can still rectify the error because poppy oil takes a long to dry. Make sure to leave your painting on a flat surface while it dries.
Walnut Oil
If you want to have more control while painting, then this oil is the best for you. Walnut oil is known for making your paint smooth, enabling you to make those long strokes that blend. It is probably one of the most expensive styling oils that you can buy.
For those artists who enjoy working with smooth and creamy oil paints, then you should get yourself one of these. This oil will provide you with consistency that will never build up and dries easily. You can even make your walnut oil if you want.
Sources
- The Truth About Oil Painting Mediums and How to Use Them
- Mixing Oil Paints: Everything You Need To Know